NES adventures
I recently picked up a homebrew game Malasombra which is awesome and unforgiving in true NES fashion. But having played this I wondered how difficult it would be to make my own homebrew game. Since I’m off all this week I thought let’s see how far I could get. Don’t get me wrong I’m using AI to help me with the Assembly, as that would take far longer than a week to learn.
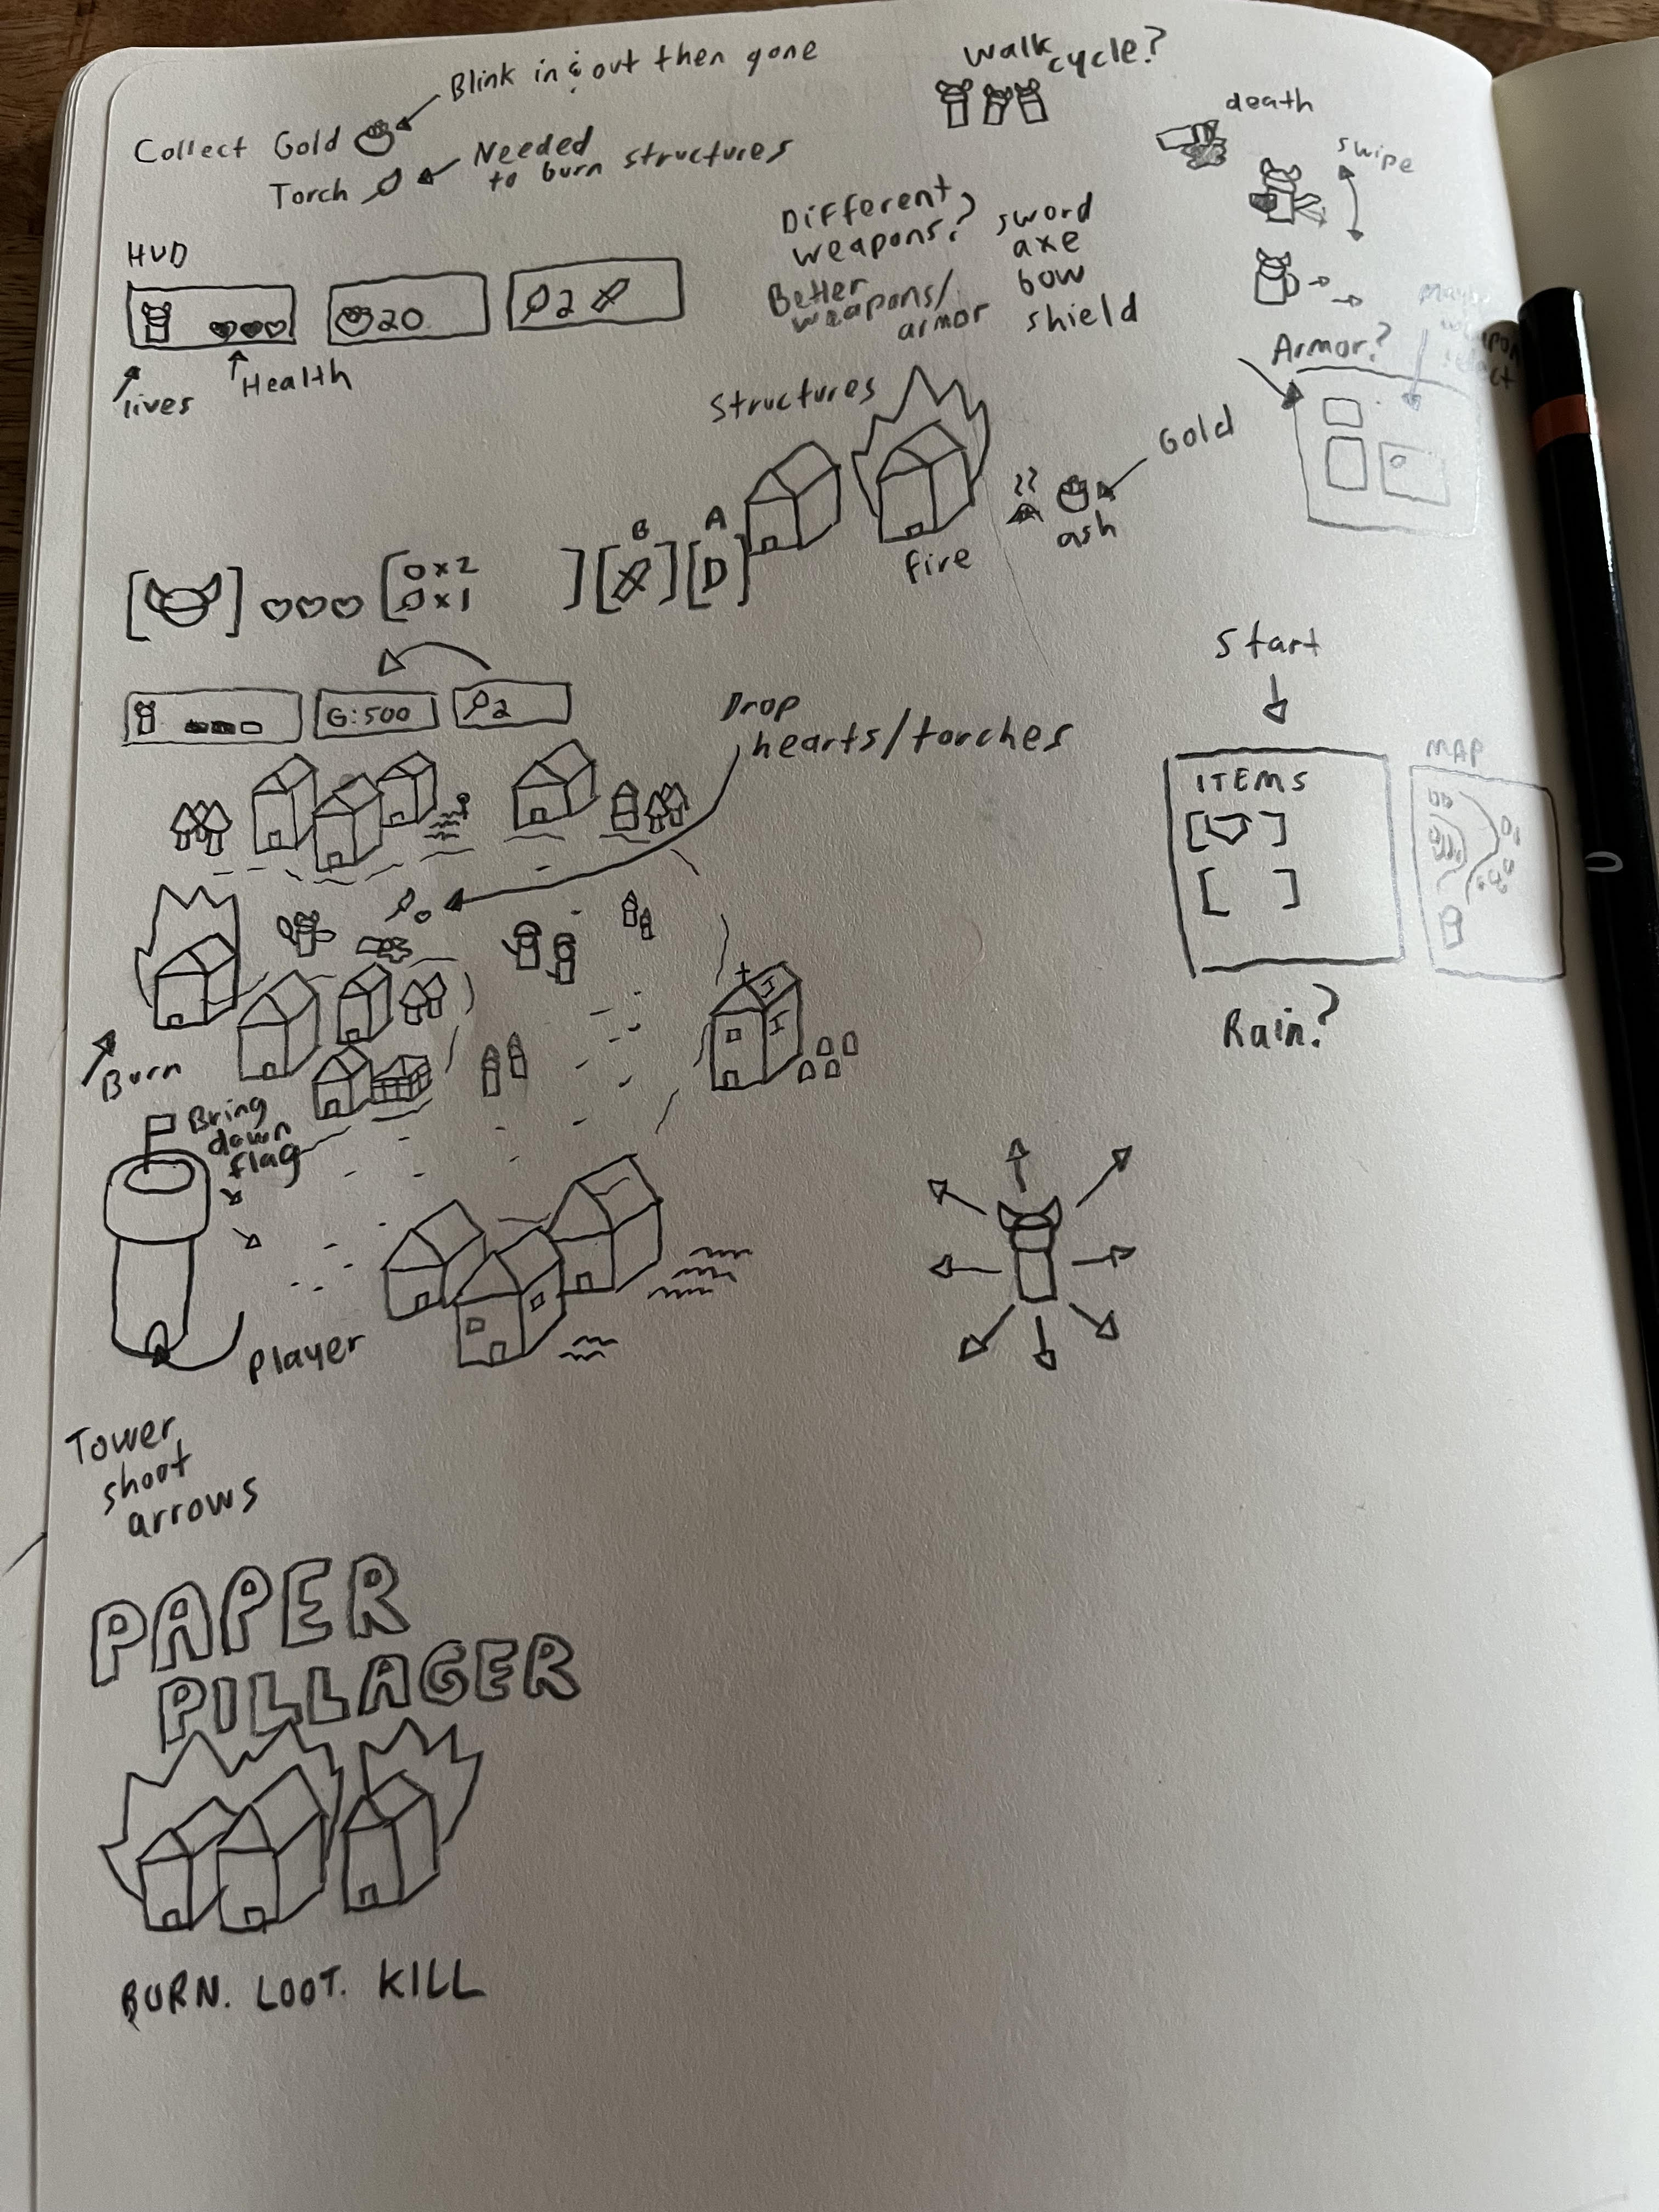
The plan is for a Crystallis like game where the player can roam the game area burning and looting buildings. Killing enemy soldiers and townsfolk.
Concept/Tools
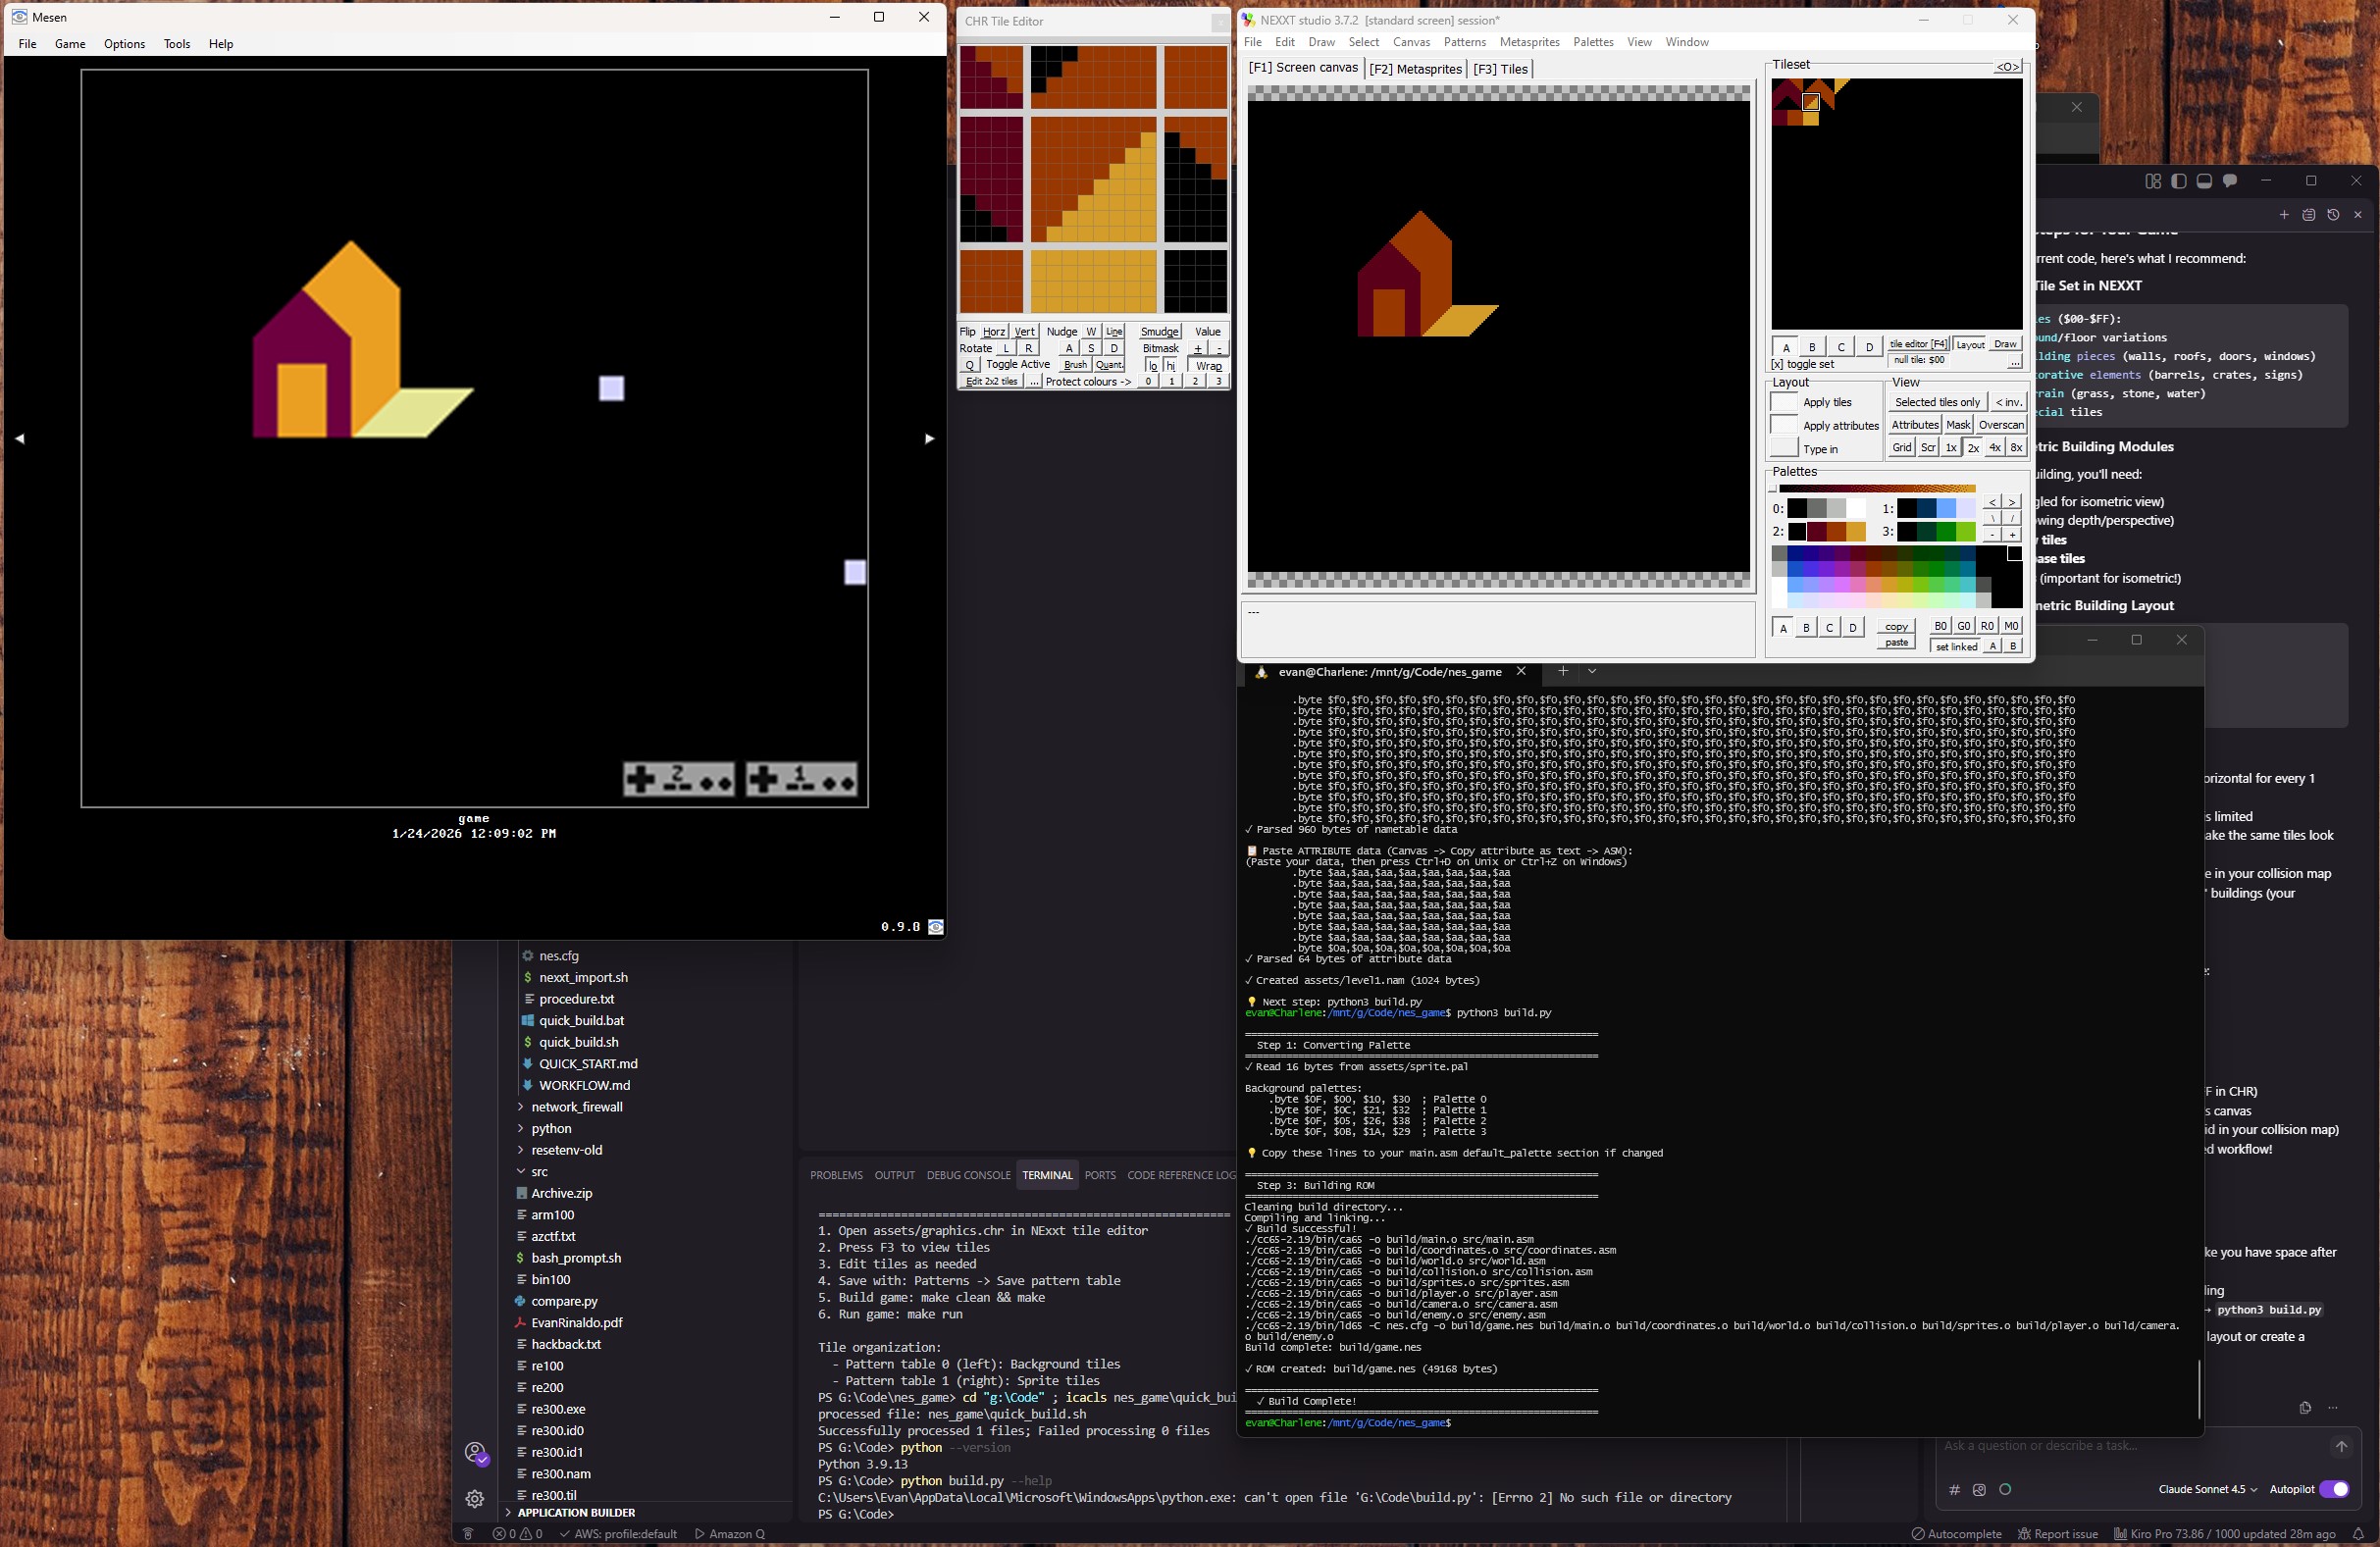
So after a bit of reading. I figured I would need some tools. NEXXT studio is what I found to create my backgrounds/sprites or what the program calls them .chr files. I already have Mesen which is a great emulator to run ROMs. After some more research I found other people writing games in C and Assembly. Which makes sense, but not knowing C at all. I figured I would stick with just plain Assembly and go from there. Just getting started with a quick game build.
- The
HEADERis the file signature that tells emulators this is a NES ROM basically. PRG-ROMis my game code using 2 16KB banks. This is where all the .asm files are compiled into.CHRR-ROMis my graphics. When I created the art in NEXXT it creates agraphics.chrfile.- Mapper 0 is the simplest NES cartridge. No bank switching..etc.
- The PPU (Picture Processing Unit) addresses come next. I won’t dive into much detail with these yet.
- Next is the controller register addresses. This is where the bit masks check for which button is pushed..etc.
ZEROPAGEis a special fast memory, that uses less code than regular RAM. It’s for fram timing, input, game state..etc.
; NES Game - Main Entry Point
; Implements basic ROM structure with iNES header

.segment "HEADER"
    ; iNES header (16 bytes)
    .byte "NES", $1A        ; iNES magic number
    .byte $02               ; 2 x 16KB PRG-ROM banks (32KB total)
    .byte $01               ; 1 x 8KB CHR-ROM bank
    .byte $01               ; Mapper 0, vertical mirroring
    .byte $00               ; Mapper 0, no special features
    .byte $00, $00, $00, $00, $00, $00, $00, $00  ; Padding

; PPU Register addresses
PPUCTRL   = $2000
PPUMASK   = $2001
PPUSTATUS = $2002
OAMADDR   = $2003
PPUSCROLL = $2005
PPUADDR   = $2006
PPUDATA   = $2007
OAMDMA    = $4014

; Controller register addresses
CONTROLLER1 = $4016
CONTROLLER2 = $4017

; Controller button bit masks
BUTTON_A      = %10000000
BUTTON_B      = %01000000
BUTTON_SELECT = %00100000
BUTTON_START  = %00010000
BUTTON_UP     = %00001000
BUTTON_DOWN   = %00000100
BUTTON_LEFT   = %00000010
BUTTON_RIGHT  = %00000001

.segment "ZEROPAGE"
    ; Zero page variables
    nmi_ready: .res 1       ; Flag: 1 when NMI has occurred
    frame_count: .res 1     ; Frame counter
    game_state: .res 1      ; Current game state
    buttons: .res 1         ; Current button state
    buttons_prev: .res 1    ; Previous frame button state
    input_dx: .res 1        ; Input movement delta X (signed)
    input_dy: .res 1        ; Input movement delta Y (signed)
Graphics
So I wanted to stay as true to my concept art as possible. However building the isometric buildings in a modular way is proving challening. I may have to re-think this a bit. It’s a very slow and tedious process and I want it to be as stream lined as possible.